Easy DIY Flower Bookmark • Little Pine Learners
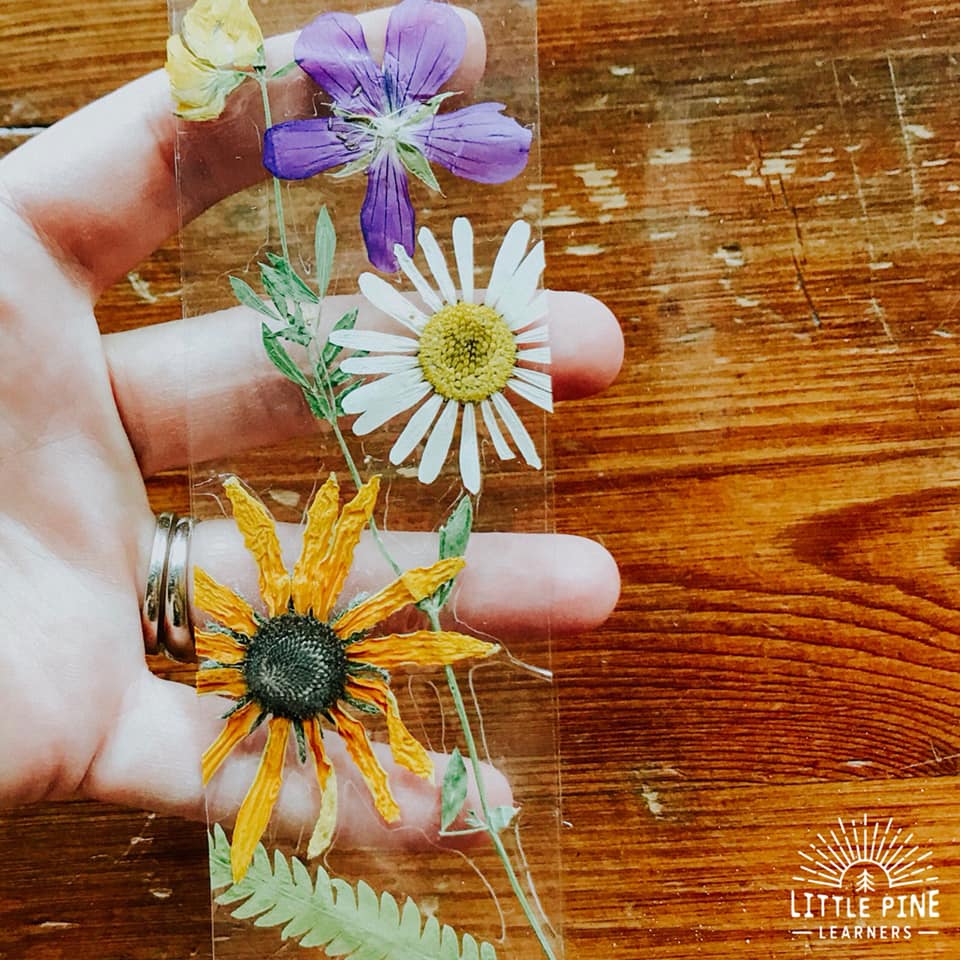
Instructions. Cut out a piece of contact paper in the shape you would like your bookmark. The bookmark dimensions we used were roughly 2 inches wide by 6 inches long. Add your pressed flowers to the sticky side of the contact paper. If desired you can also add some gold foil along with your flowers in this step.

Handmade unique bookmarks, Dried Pressed flowers bookmark, Flowers
This is the time you'll want to arrange the petals and leaves exactly how you'd like them to lay. I find it can be fun to let it be a surprise, too! 1. Press Your Flowers. Close the flower inside the book, and when you get home, place the book on a flat surface, and add some weight on top. (I used about eight hardcover books.)
Handmade bookmark with dried flowers Etsy
The quicker method is to use a hot iron to steam the water out of them. You just place the flowers that you want to press on top of a towel. Then place a double folded paper towel on top. Gently press a hot iron on top of the paper towels. Make sure not move the iron back and forth. You don't want to mess up the petals.

Pressed Flower Crafts, Pressed Flowers, Dried Flowers, Nature Bookmarks
Steps. Cut your paper.It's completely up to you how big you want your bookmark would be. Just don't get it too long and not too wide that it would stick or jut out the edge of the book that you will bookmark. As for the size of our bookmark, its 6 X 1.75 inches wide. For aesthetic purposes, you can cut in some creative grooves on the other.

Pin on dried flower
Want to preserve those gorgeous flowers? I am giving a few tips on preserving your blooms, and also how to create easy yet beautiful bookmarks! These are so.

Laminated bookmarks Pressed flowers Dried flowers pressed. Etsy in
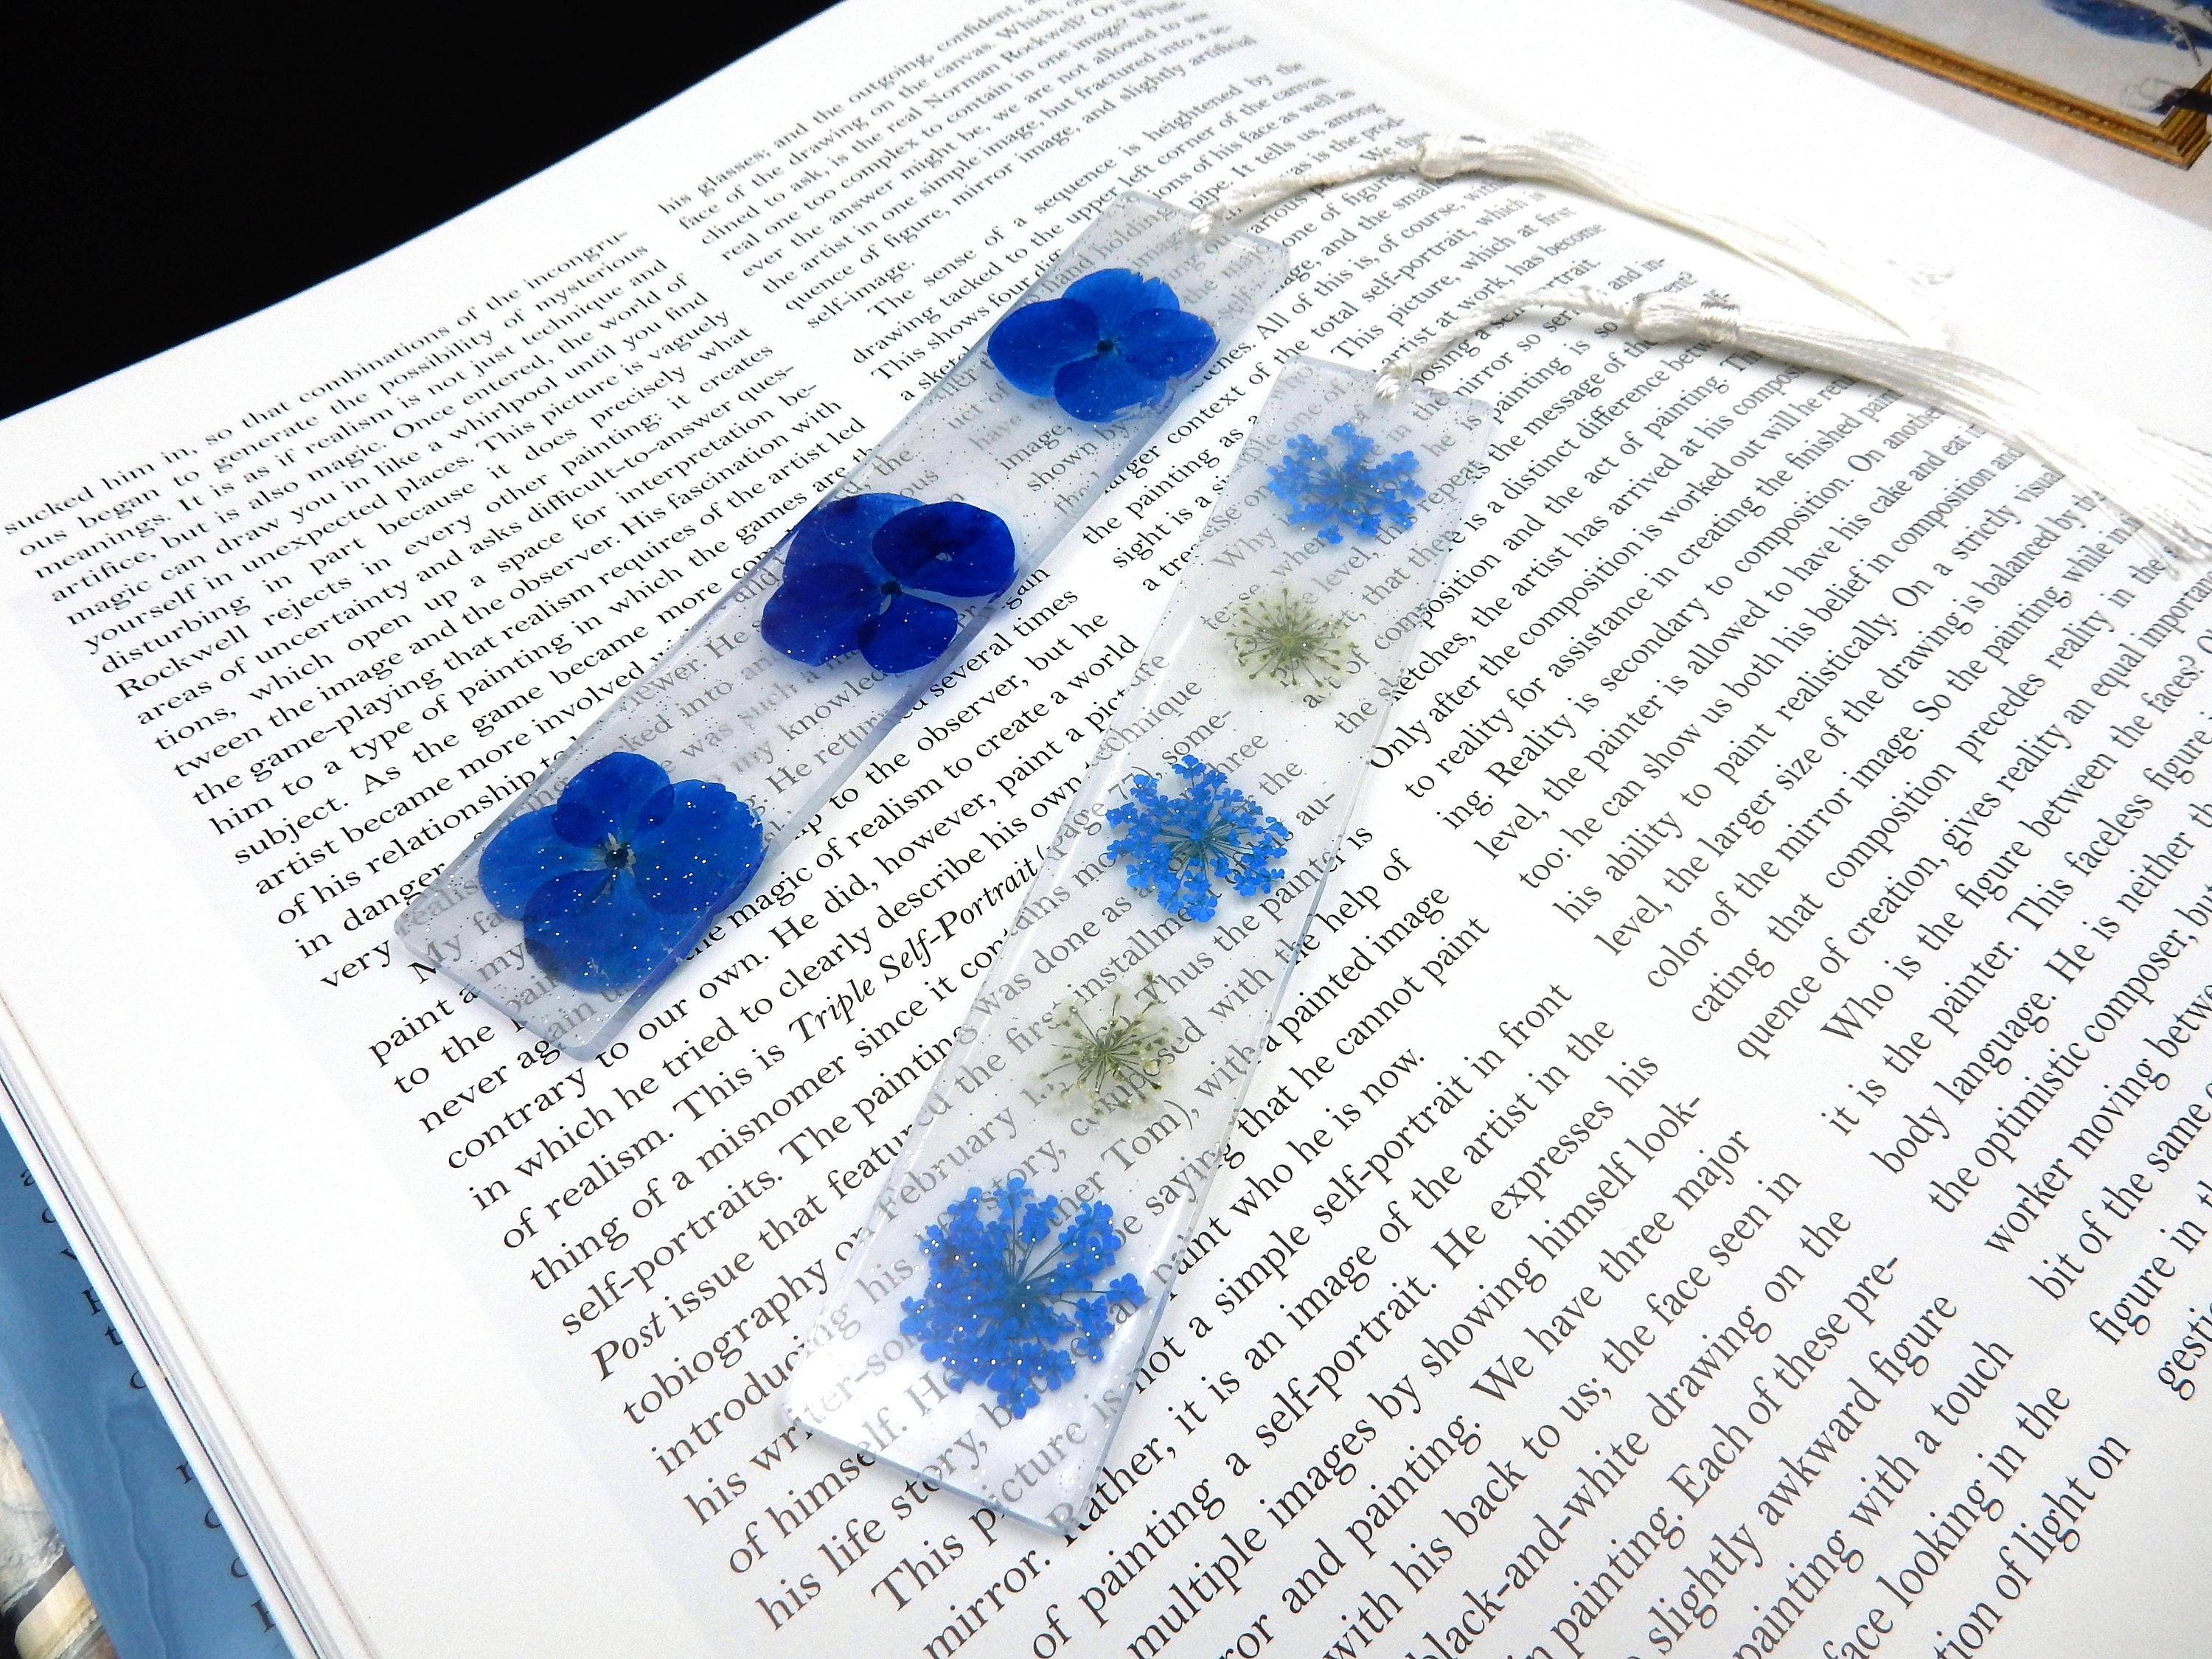
Step 2: Prepare the Plastic Bookmarks. My bookmarks came with a film on both sides. Remove the film from both sides of the bookmarks. I used my Cricut weeder to "scrape" back the film on the edge of the bookmark. Once you pick up a corner, the film easily peels back.

How To Make Dried Pressed Flowers Easy, low prep, and perfect for
For the full instructions visit: https://onelittleproject.com/pressed-flower-bookmarkIt's so fun and easy to make a DIY pressed flower bookmark, using Mod Po.

DIY Howto aesthetic Bookmarks 📖 🌻 somekindwords blog Handmade
Step 2: Cut out the bookmark base. Draw a 6 inch by 1.5 inch rectangle on a piece of paper or cardstock. (Or whatever size you'd like your bookmark to be) Cut out the rectangle. Place the rectangle on top of the transparency film. Carefully hold the rectangle in place and cut around it to make the transparent bookmark.

DIY Dried Flower Bookmarks Flower bookmark, Pressed flower crafts
Charms (optional) How to Make Pressed Flower Bookmarks Step by Step. 1. Gather Your Flowers. For convenience I purchased all of my flowers on Amazon. It's much easier than pressing your own fresh flowers. Before I begin I like to put the dried flowers in rainbow order to help with the creative process.

PRESSED FLOWER BOOKMARKS Set of 3 Bookmarks Pressed Dried Etsy
Step 1: Collect Flowers, Plants, and Leaves. To create a bookmark, first collect various leaves, herbs, grasses, flowers, and even seeds. It is best to do your collecting on a dry and sunny afternoon. The drier your material is, the better. Moisture tends to cause problems during the pressing process. You'll soon learn which leaves and petals.

Pink and blue bookmark Flower bookmark, Dried flowers, Resin flowers
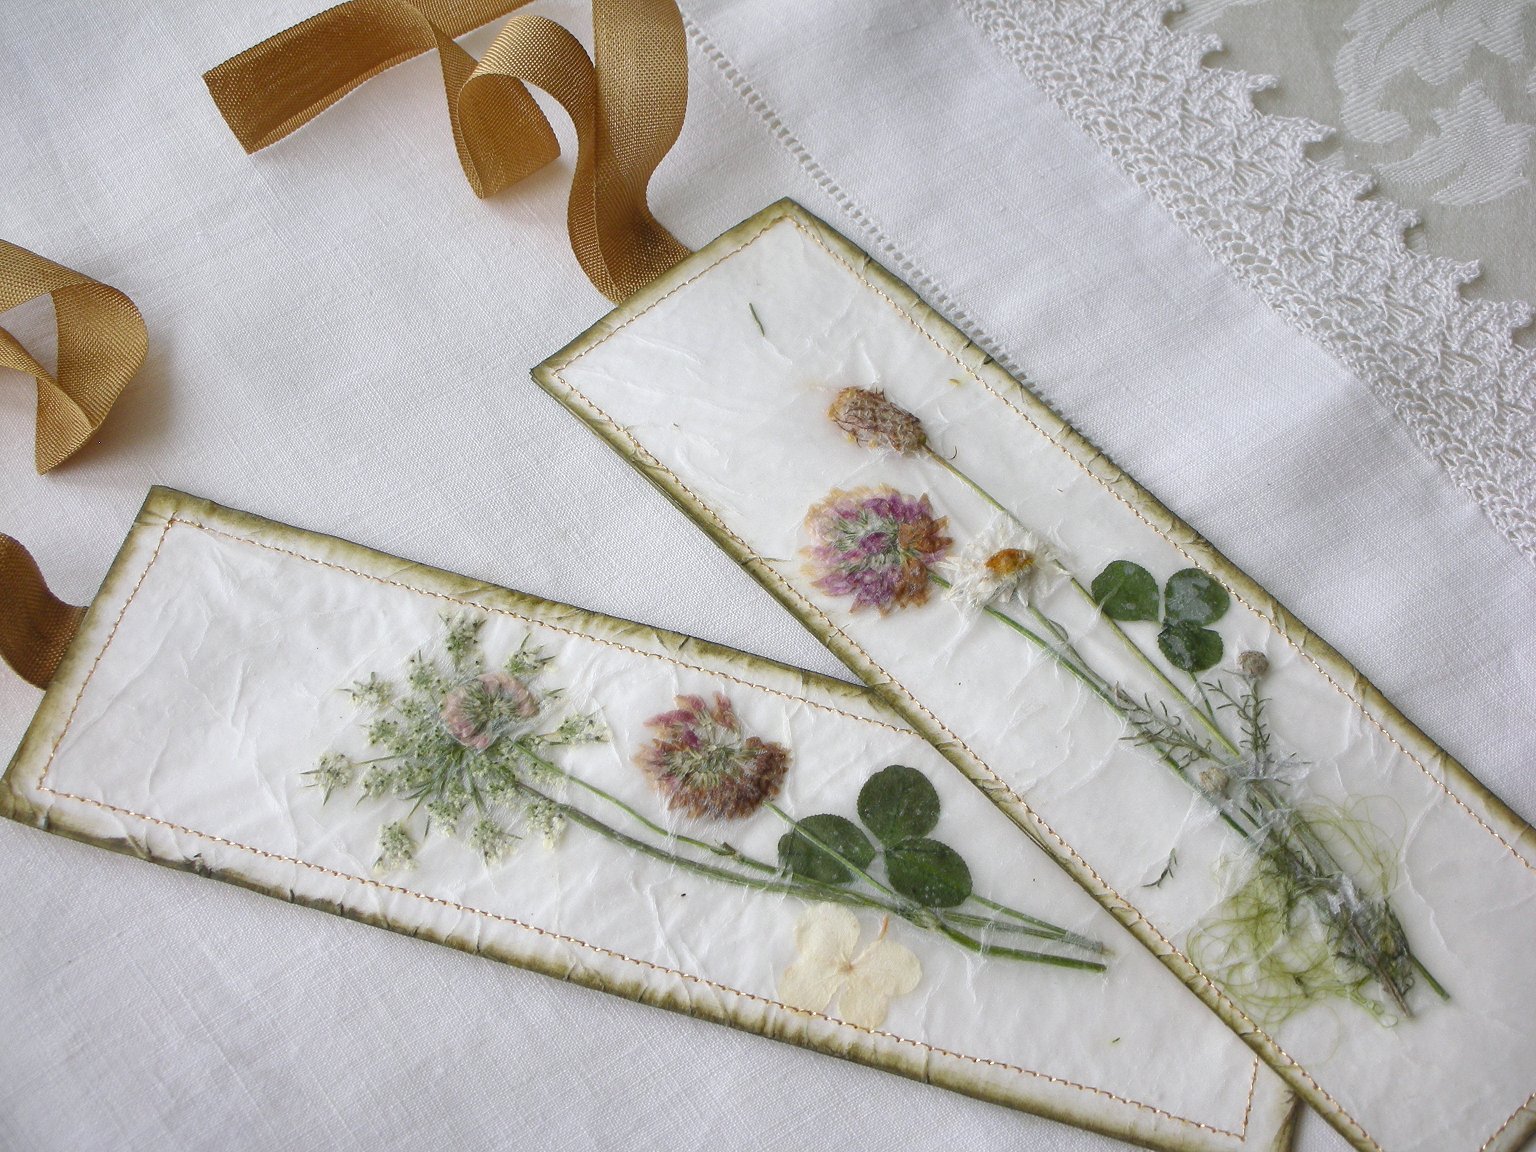
Make sure they are completely dry before using them. Cut the card stock to size and rip the handmade paper to size. Using the Modge Podge, glue the handmade paper to the center of the card stock. Arrange flowers in a pattern you enjoy and then carefully remove them. Modge Podge the paper where each flower will stick.

Dried Flower Bookmarks in 2023 Flower bookmark, Dried flowers, Plant
Instructions. Use a ruler to measure a 2" x 7" stick of paper for each bookmark and cut it out using scissors. Add wording to your bookmark using markers, stickers or some other method. Add dried flowers and leaves to the bookmark, by gently painting glue onto the backs of the flowers and leaves using a paint brush.
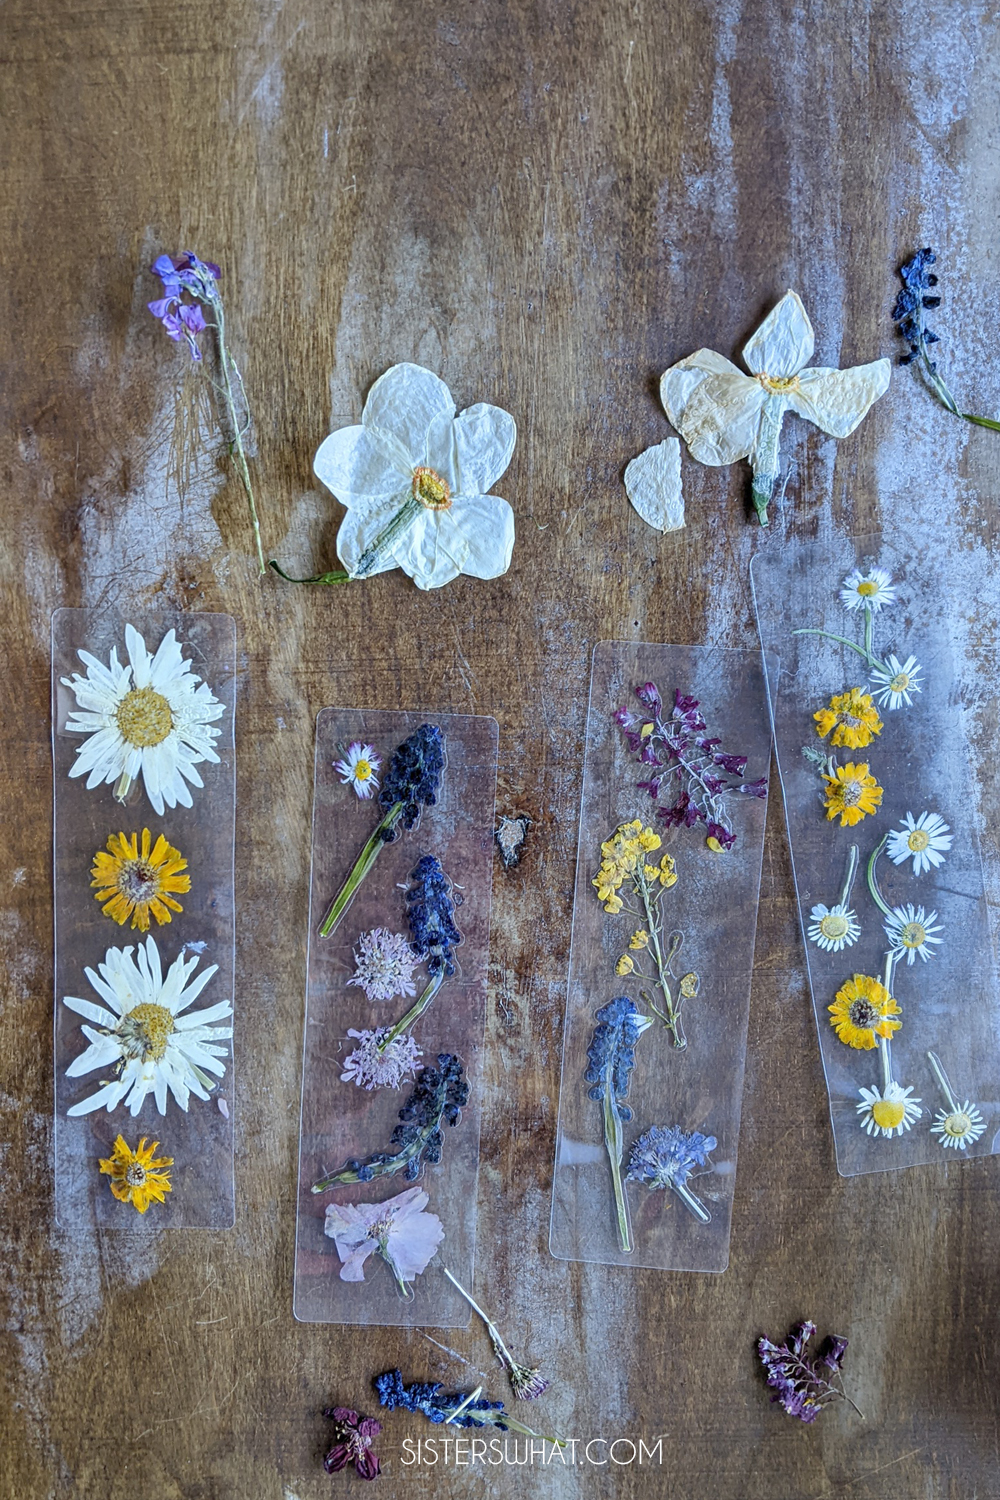
How to Make Pressed Flower Laminated Bookmarks Sisters, What!
These are also quick and easy to make for craft shows, or as an easy kids' craft. Cut a piece of paper into the desired size for your bookmark. You can use whatever size works best for your use, but most bookmarks are no larger than around 8 inches long and 2 inches wide. Choose a color of paper that coordinates well with your dried flowers.

Handmade bookmarks of dried flowers Handmade Bookmarks, Library
Step 7: Glue your flowers. Apply now your white glue to the backside of your flowers. Make sure to use a brush. Then stick your flowers carefully onto the paper. If you like to switch your flower pressed bookmarks up a little bit use white paper towels and either attach them under or over the flowers for a nice touch.
Her Creative Spirit Pressed Wildflower Bookmark Tutorial
Wait at least 2 days and open the book up. If they're sufficiently pressed, you're ready to go! If you want them more flat or dry, leave for another day or two. Cut a bookmark-shaped strip of clear contact paper. Remove the backing and place it on a surface with the sticky side up.

Pressed flower bookmark, laminated bookmarks, dried pressed flowers
Continue this process of painting Mod Podge, pressing down your dried flowers, and then painting a layer of Mod Podge on top until the whole bookmark is filled to your liking. Let the glue dry for about 15 minutes and then I would recommend adding one more layer of Mod Podge over the whole surface just to make sure you didn't miss any spots.
